
The papers a school issues most often
A school office is asked for the same few documents all year: a bonafide certificate for a bank or a scholarship, a conduct certificate for a college, an ID card when one is lost and, at the end of a stay, a transfer certificate. Writing each one by hand in a word processor means retyping the child's details and hoping that nothing is wrong.
The certificates module in My KalviKoodam makes these from the student record, so the name, class and other details come from the record and are not typed again.
A certificate carries a small risk of its own. If two clerks write the same certificate in two different ways, a student can end up holding papers that do not agree. Making them from one record, with one approved wording, keeps the school's papers consistent from one clerk and one year to the next.
The office also saves a visit. A parent who needs a bonafide certificate for a bank can be given one while waiting, because the work is picking a student and printing. An office that issues only a few a month still benefits, since the saving is in avoiding mistakes and reprinting as well as in speed.
Six student certificates
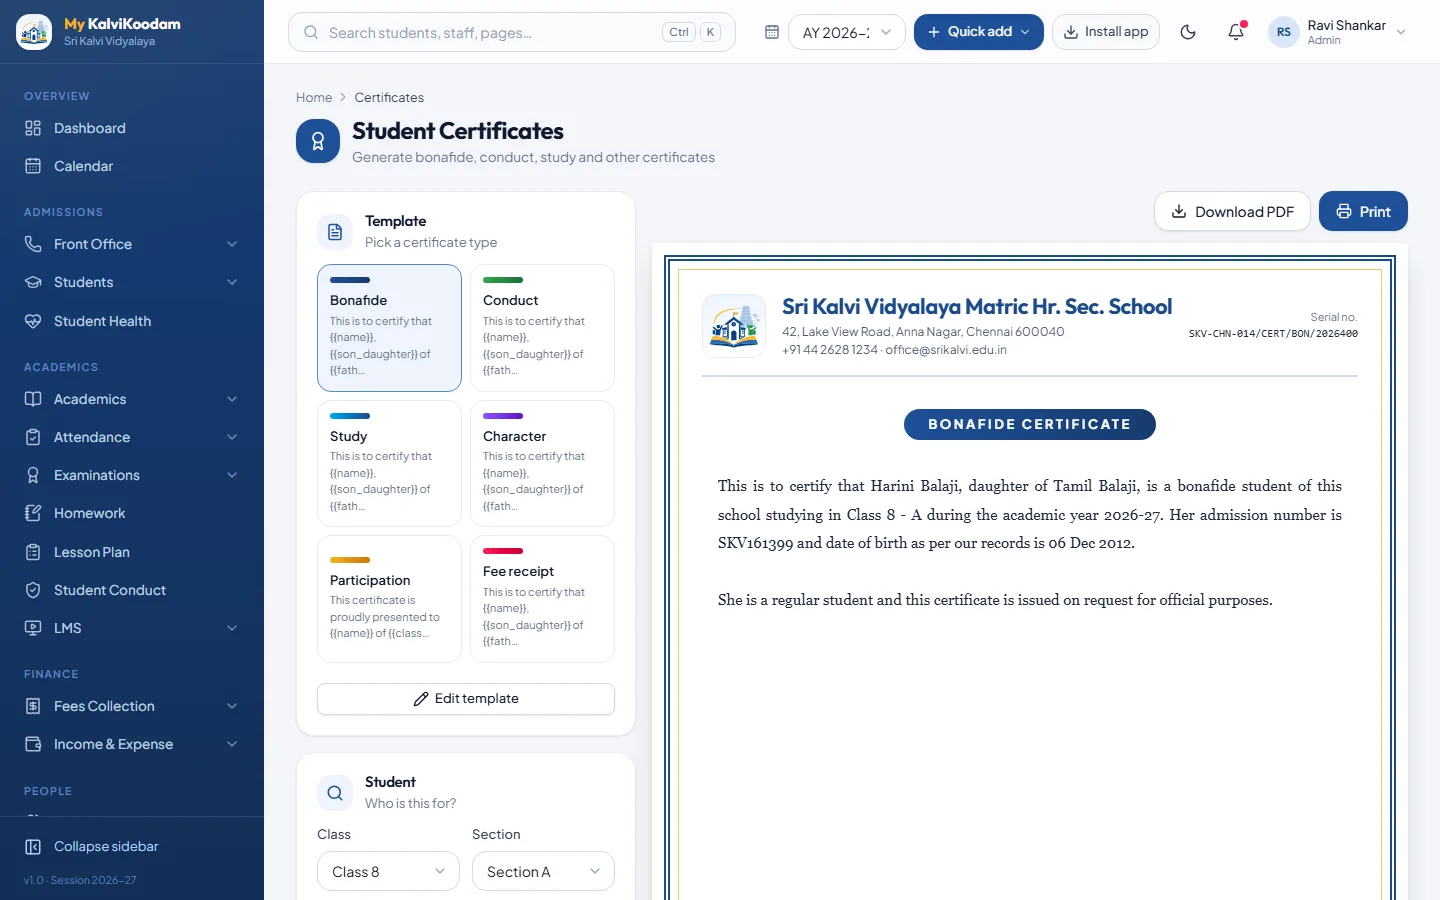
The module comes with six certificates for students. You pick the student, choose the certificate and print it.
Each certificate has its usual use, though the school decides when to issue it. A bonafide certificate commonly confirms that a child studies at the school. Conduct and Character certificates speak to behaviour. Study, Participation and Fee payment certificates cover classes studied, events attended and fees paid.
The six cover the common cases, and each can be reworded, so a Participation certificate, for example, can be adapted to the event the student took part in.
- Bonafide
- Conduct
- Study
- Character
- Participation
- Fee payment
Wording you can edit
Every school words its certificates in its own way. The title and the wording of each certificate can be edited, so a certificate reads the way your school has always written it. The text is set once and then used for every student, which keeps certificates consistent from one year to the next.
Certificates carry the school's name, so check the wording with your management or the authority your school answers to. The software makes the editing easy; the content is the school's own.
A practical tip: edit the wording on a quiet day, have the principal or the management approve the text, and print a sample for a real student before using it widely. Once approved, the office issues each certificate without drafting anything, which also means the wording cannot drift between clerks.
If you have an older certificate format, keep a copy beside you when editing the wording, so the text in the system matches the format parents and colleges already know.
Serial numbers counted per template and year
Each certificate is given a serial number, counted separately for each template and each year. If a parent asks whether a certificate was issued, the office can find it. Issued certificates are kept as permanent records, so the register does not depend on a loose file or a single computer.
The serial is not decoration. Years later, when a former student returns with a certificate and asks for a copy or a check, the number tells the office where to look. Counting per template and year keeps each sequence short and easy to read out over the phone.
Serial numbers do two jobs. They link the paper to the school's own record, and they let the office see how many of each kind it issues in a year.
The transfer certificate register
The transfer certificate has its own numbered register, with numbers in the form TC/year/number, and one certificate per student. The register is a permanent record: it shows what was issued, to whom and when.
Issuing a transfer certificate can also mark the student as having left school. That one step updates the student record and, because a pupil who leaves loses their login straight away, closes the parent and student portal login at the same time.
The register is where the school shows what it issued. The one-certificate-per-student rule prevents a headache that office staff will recognise, two transfer certificates carrying different numbers for the same child. The register lists what was issued and to whom, in numbered order, and stays as a permanent record.
A practical use of the register is at the end of term, when staff review how many transfer certificates were issued and for which classes. The numbers in the register and the students marked as left school go together.
Issuing a transfer certificate, step by step
The transfer certificate is the most serious paper a school issues, so it helps to follow a fixed routine. The module is designed around the student record, which keeps the steps short.
Before you issue, open the student's profile and look at the details that will appear on the certificate. Fees, attendance and documents are on the same profile, so the office can see the whole picture in one place first.
- Pick the student from the student record
- Check that the details on the record are correct
- Issue the transfer certificate, which takes the next number in the TC/year/number register
- Choose to mark the student as having left school, if that is what is happening
- Print on plain A4 and hand it over
- The certificate stays in the register as a permanent record
ID cards for students and staff
ID cards print for students and for staff, in a vertical or horizontal layout, and can be printed in batches. Student photos on the record appear on the card. Staff ID cards print from the staff list in the staff module, so there is one source for names and photographs.
A lost ID card is a five-minute job when the photo is already on the record: pick the student, choose the layout and print. At the start of the year, printing in batches is the quicker route. Staff cards come from the staff list and use the photo kept there, so teachers and support staff are handled in the same way.
ID cards tend to be needed in a rush at the start of the year. Because the photo and details are already on the record, there is nothing to collect again: the office checks the layout, selects the class and prints.
Printed on plain A4
Certificates, ID cards, receipts and marksheets print cleanly on plain A4 paper. The office does not need special stationery software to get a tidy result,.
This matters in a small office with one ordinary printer. There is no template to buy and no special paper; the school prints on what it already has. Receipts, marksheets and admit cards print the same way, so staff learn one habit for all the school's paperwork.
The printed copy can be signed and stamped in the usual way.
Habits that keep the certificate desk tidy
A certificate desk works best with a few agreed habits. None needs any extra software, and together they mean that the register can be trusted when someone asks about a paper years later.
- Decide who may issue certificates and who approves the wording
- Keep one approved wording for each certificate
- Correct the student record first, because the certificate uses it
- Issue every certificate through the system, never by hand-typing a separate copy
- Look through the issued certificates at the end of the year
Who issues certificates
The principal, vice principal, school director, correspondent and receptionist can use the module. The related student record is described on the student information system page. When you are ready to see a transfer certificate made from a sample student, book a demo.
Each role sees only the screens it is allowed to open, so the module stays with the leadership and office roles responsible for official papers. Parents and students do not see it, which keeps control of what is issued with the school.
In many schools the receptionist takes the request and the principal signs the paper; the module supports both, because both roles can open it.